|
5. Sharpening
The problem is sharpening is subjective, what you may think is OK
is too sharp to someone else (the screener.) I tend to under sharpen
as much as possible. I also use the Intellisharpen II
plug-in from Fred
Miranda at this stage. In my opinion it is far superior to PS2.
The main object is one wants to improve the boundaries between the
colours without inflicting a white edge (halo) between them.
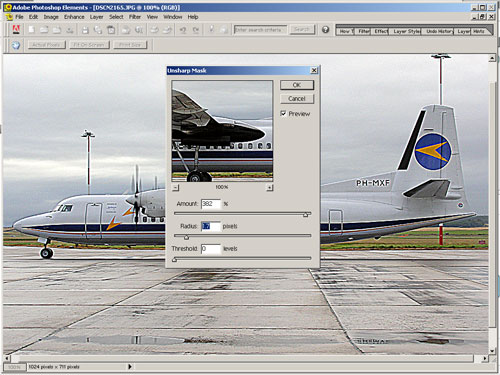
Grossly oversharpened image
View the image at 100% by selecting VIEW,
ACTUAL PIXELS (Ctrl+ Alt + O that is zero not o by the way)
I have also turned off the Tools palate, by selecting WINDOW,
TOOLS.
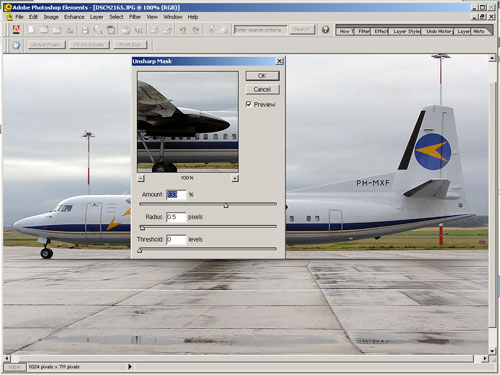
Select, FILTER, SHARPEN, UNSHARP MASK. The USM default is
270, 0.5 and 0, set the values to 100, 0.5 and 0. Put your cursor
onto the window and drag the picture to the registration.
Amount:
How much of the effect is applied. Usually around 90-100% for normal
sharpening with small radius.
I copied this from somewhere, unfortunately I
can not remember where, so my appologies if you are the copyright
holder.
Radius
This result in how far the edge detection goes around the pixel
which is being processed. Small radius (around 0.5-2) is used for
normal sharpening.
Fine details needs a smaller radius.
Threshold
A tolerance of how much the pixels have to differ before the effect
is applied to them. 0-effect is applied to all pixels.
This is a good setting to prevent smooth areas from sharpening.
Usually applied about 3-4.
The best advice is to try different setting however
for normal sharpening the rule is small radius and bigger amount.
Large radius
A normal sharpening requires small radius, usually below 1.0. Why
do we have the radius slider go all the way to almost 100?
By using large radius and small amount you can do "haze removal"
which will globally improve contrast of image in a certain way,
yet it will not sharpen the details. Try for example Amount 25%
Radius: 60 and Threshold: 4
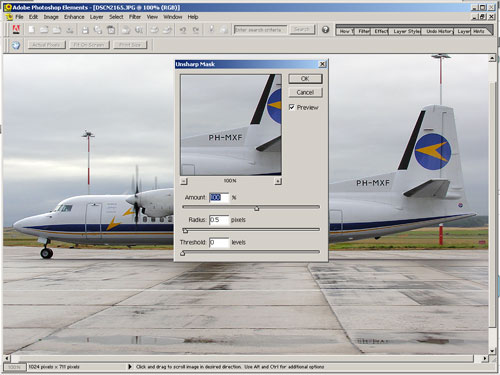
I would use a number like 133, 0.5 and 0. Drag
the hand over the picture to check other parts of the aircraft like
the rising cheat line at the tail and nose.
When you are happy, select OK. Again you can reset the USM (before
the pressing the OK button) by holding down the Alt key the
CANCEL changes to RESET.
6. Saving
DO NOT save the original file,
this overwrites your original picture with the changes that you
have just made destroying your original for ever.
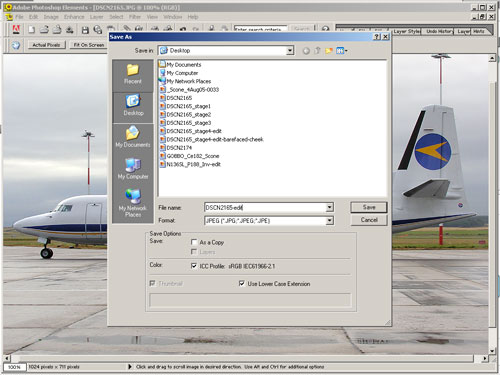
Select FILE, SAVE AS and rename your file.
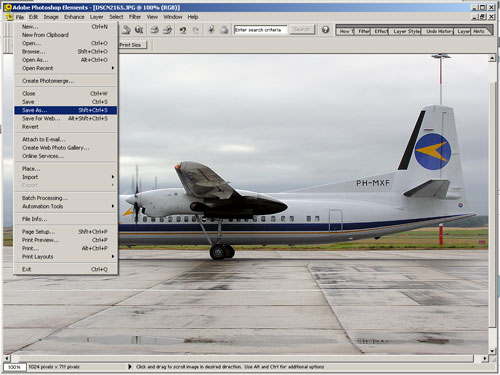
I prefer to add "-edit" to the file
name so I know just by looking at the file name that it is not the
original image.
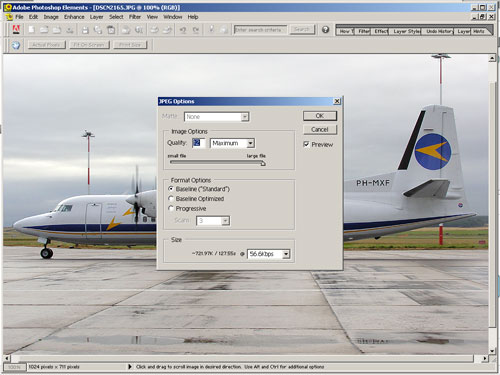
A pop-up box will come up, make sure the QUALITY is at 12
and MAXIMUM and that the triangle is to the far right. This
will apply the minimum of compression to your image. Select OK
to save the image as....
And there you have it. There are other little
dodges one can use such as improving the saturation and lightening
the tones but this is enough to be starting with.
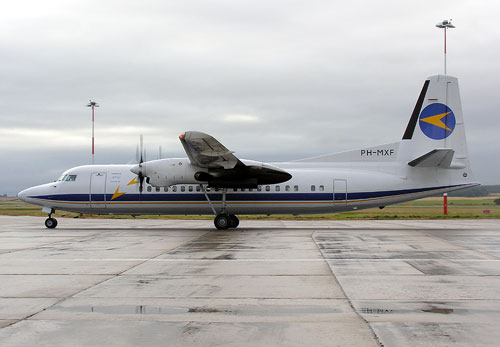
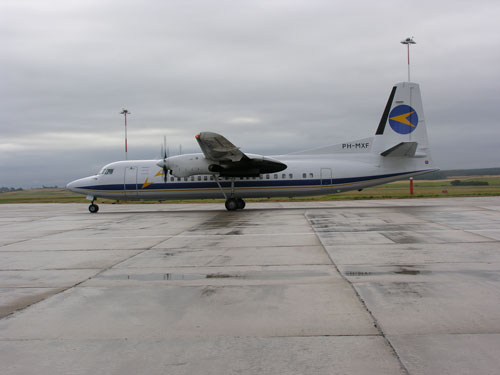
The finished article
Compare this to the original at the top
of the page.
Stage
5 - A stage too far?
|